First, thank you for purchasing our theme!
Hi, It’s awesome to know that you decided to purchase Techcode.
No doubts, you will join our happy customers community in seconds! You won’t make any mistake here, because our detailed documentation will guide you. Please be sure to check it out before getting started.
We have outlined all kinds of necessary information and keep them easy-to-read-and-follow.
Our theme is based on WordPress platform, so we assume that you have already WordPress installed and ready to go.

After you downloaded theme files you will find inside it;
01. Theme Install - Theme file for WordPress installation, if you want to install your theme manually (with FTP) you must unzip this file.
02. Documentation - Contains Techcode theme documentation
03. Plugins - Revolution Slider paid plugin zip file.
Server requirements is one of the key factors for WordPress and Techcode theme, it is highly recommended to use a server which supports the following requirements. We explain about WordPress, Techcode, WooCommerce server requirements.
We recommends following server settings for Our WordPress Theme:
PHP: Version 5.6 or greater.
MySQL: Version 5.6 or greater
Mod_rewrite: The Apache module needs to be activated for pretty permalinks.
GD Library: The library needs to be installed for Captcha and Image cropping.
cURL: Supported by the server.
OpenSSL: Supported by the server.
Allow_url_fopen: Supported by the server.
Post_max_size: 64 MB or greater
Upload_max_filesize: 64 MB or greater
Memory_limit: 256 MB or greater
max_execution_time: 900s or greater
max_input_vars: The minimum value is 4000 but the recommended is 6000.
PHP: Version 7 or greater.
MySQL: Version 5.6 or greater.
MariaDB: Version 10.0 or greater. Only required if you are not using MySQL.
HTTPS: Supported by the server.
Techcode support WooCommerce officially so it is best to make sure your server also supports this plugin requirements if you are going to set up a shop
To learn about the plugin server requirements, read the official article.
Once you have setup a copy of WordPress, there are two ways you can go about installing the theme:
- Unzip the download and upload the theme directory into your WordPress themes directory /wp-content/themes/.
- This is definitely the easier route for most. Simply navigate to Appearance > Themes > Add New > Upload Theme. Click the 'browse' button and locate the still zipped theme folder. The theme will be uploaded and installed in a matter of seconds. /wp-content/themes/.
- Unpacking the theme
- Before installing the theme, please make sure you unpacked the archive and extracted the theme files. Some of the folders names may slightly vary. Treat the screenshot below as an example only.

If you try to install the wrong files, you will get the missing style.css error. This is the most common error that means you are trying to install an incorrect package.


- Install via Wizard
After you activate the theme, a wizard popup will appear, you will now go to the steps of the installation.

- Install via Dashboard
When you are not involved in installing the theme through the wizard, you can install the plugins easily through the theme's control panel.

Step 1: After you activate Techcode, you will see a sub-menu named "İnstall Plugins" inside of Appearance menu.
Step 2: Click on İnstall Plugins
Step 3: Install and activate all plug-ins
Let's start with our awesome demos. You can easily install demo content with one click with the steps in the popup wizard.


- Theme Option Overview
The options panel is home to all of the theme's extensive configuration options.
To view the panel, click on Theme Options in the left-hand menu. Here you have the ability to alter many core aspects that make up how your theme looks and behaves.
Any of the options that have some ambiguity to them conviently have descriptions to explain their purpose.

- Page Option Overview

- Template Overview
You can create templates here to use in our built drag-and-drop templates.

1. From the 'Appearance' menu on the left-hand side of the Dashboard, select the 'Menus' option to bring up the Menu Editor.

2. Select create a new menu at the top of the page

3. Enter a name for your new menu in the Menu Name box.
4. Click the Create Menu button.

5. Click Select to select menu created.

Your new custom menu has been defined.
You can add different link types into your menu, these are split between panes left of the menu you're currently editing.
1. Locate the pane entitled Pages.
2. Within this pane, select the View All link to bring up a list of all the currently published Pages on your site.
3. Select the Pages that you want to add by clicking the checkbox next to each Page's title.
4. Click the Add to Menu button located at the bottom of this pane to add your selection(s) to the menu that you created in the previous step.

5. Click the Save Menu button once you've added all the menu items you want.

When planning the structure of your menu, it helps to think of each menu item as a heading in a formal report document. In a formal report, main section headings (Level 1 headings) are the nearest to the left of the page; sub-section headings (Level 2 headings) are indented slightly further to the right; any other subordinate headings (Level 3, 4, etc) within the same section are indented even further to the right.
The WordPress menu editor allows you to create multi-level menus using a simple 'drag and drop' interface. Drag menu items up or down to change their order of appearance in the menu. Drag menu items left or right in order to create sub-levels within your menu.
To make one menu item a subordinate of another, you need to position the 'child' underneath its 'parent' and then drag it slightly to the right.
1. Position the mouse over the 'child' menu item.
2. Whilst holding the left mouse button, drag it to the right.
3. Release the mouse button.
4. Repeat these steps for each sub-menu item.

5. Click the Save Menu button in the Menu Editor to save your changes.
1. Scroll to the bottom of the menu editor window.
2. In the section titled Theme locations, click the check box for the location where you want your menu to appear.

3. Click Save menu once you've made your selection.
Congratulations! Your menu has now been added to your site.
You can set any menu as Primary menu here.

To translation the theme, i suggest you using Loco plugin. This plugin can help you do all things easy.
Please read guide document for detail here: Loco Translate
Or, follow me:
Translate Theme – in cases, you need to change default texts of Our themes in your website front end. This theme is built our way that you can translate it with ease. We have already added default “.pot” WordPress language files and you can start WordPress theme translation from there.
Translate Theme – PO/MO files
WordPress uses 2 file pair with PO and MO extensions to understand where to put alternative texts inside code. PO file is a Key/Value pair file which will be used to add translations of specific phrases. MO file is compiled version of PO file which WordPress understands.
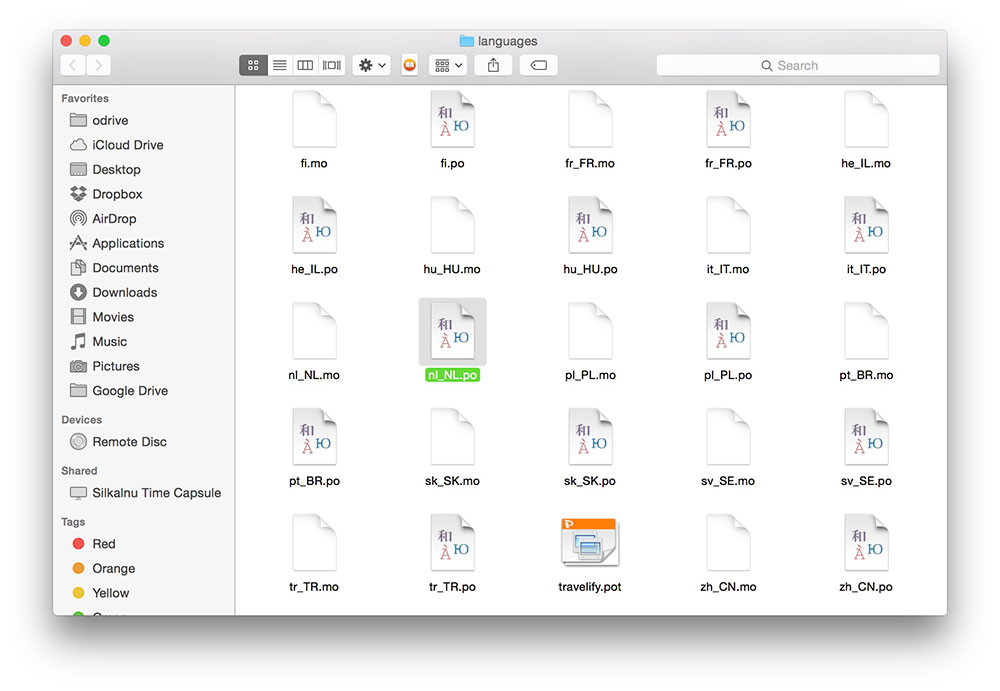
Our themes also have their own PO/MO file pair that you can use to translate different parts of the theme. Those files are located in wp-content/themes/theme name/languages folder.
You will need a software called POEDIT to edit PO files and add your translations inside that and generate MO file out of it. It is free, works on Mac, Windows and Linux, easy use and there is no reason not to use it.
For more information please read this article in details:
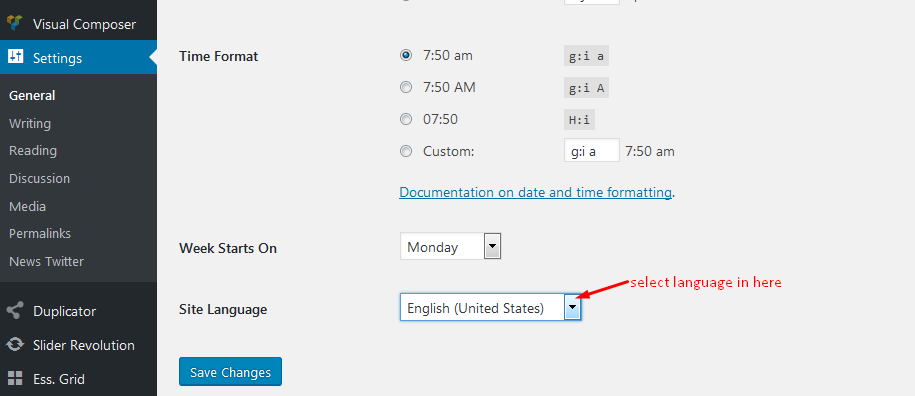
1. Set Default Language.
Go to Settings > General > Site Language and set it to your desired language.
2. Install the Child Theme.
Install the Child Theme so that your translation will be safe upon updating core theme.
3. Copy Languages Folder.
Go to wp-content/themes/theme name/languages and copy folder and paste it into your child theme wp-content/themes/theme name-child
So that you will have a folder on your child theme called languages:

You will see file there that you can use for translation (theme name.pot). Please consider that the name of these files should be the same as your default language code which you have set in wp-config.php file explained at the beginning of tutorial.
4. Use Loco Translate.
The Loco Translate is a third party plugin which makes it possible to edit the PO files and compile them to MO files directly from the WordPress Admin section.
5. Alternatively Use POEDIT.
If for any reason you can not use the Loco Translate plugin, you can use POEDIT software to do your translation and generate MO files alternatively. For more detailed information on how to use POEDIT
5.1. You need download POEdit from: https://poedit.net/
5.2. Second thing is to open default language files form your theme. in normal our theme, it is located in languages folder inside theme folder. You should use this default file for translation but you need to create a new file when you are done. Most themes has the same structure and language files should be somewhere inside theme folder. There is chance that your theme is not ready for translation so it might take time to modify.
5.3. Now in the Poedit click on original text one by one and write your translation underneath. Just like you can see iu the screenshot below. It will take some time to get through all of them so be patient.
If you think that some translations you won’t need you can leave them as they are in the original language.

5.4. Now the most important part: When you are saving your file in theme language folder you should use proper language code.
For instance if you have translated WordPress theme to German you shoulduse “de_DE.po” as file name and “fr_FR.po” for French. This will make sure that WordPress understands what language you are referring to.
Please note: Default language file extension is .pot (such as organic.pot... ) but you have to use .po in order to make your translation work. Also Poedit application will create .mo and it needs to be included in languages folder as well.
5.5. Now WordPress will use theme language the same as your WordPress language. If your WordPress dashboard uses French, don’t expect for theme to show German. Changing WordPress language will automatically
change theme language if it is available in the theme language folder under proper name we discussed in Step 4.
5.6. Changing WordPress language is as easy as adding
define ('WPLANG', 'fr_FR');
to the wp-config.php file located at your WordPress installation root folder.
Beware! You need to activate your child theme from Appearance menu to see translation working.
Beware! You will need to clear cache to see the translation.
Since the introduction of WordPress version 4, there is a new option in general settings section which you can use to select your installation default language. Go to Settings > General > Default Language to see the option.
Thank you!
1. Editing
Techcode has wonderfull widgets for building project pages but before start creating a project page you need to activate Elementor for project pages.
So please follow these steps below;
Step 1: Navigate "Elementor > Settings" on your dashboard.
Step 2: You'll see post types section below "General" tab.
Step 3: Click on "Portfolio" checkbox and save changes
So you'll be able to edit project pages with Elementor
2. Project Metas
You can add other project details here; these informations will be displayed on single project page and showcase layouts.
Summary: A description about the project.
Excerpt: Project excerpt for diplaying some of the showcase layouts.
Client: Project client.
Year: Project year.
3. Project Header
As you know Techcode offers different project header styles. In this section you can set-up project page header.
Header Style: Header style selection.
Animate Header: Animating project header.
Featured Image Type: Featured image type selection between "video" and "image".
Our themes are optimized by with H1, H2, H3, H4, H5 tags, clean code, HTML5 but if you want to get higher ranking on search engines, you must need some help from SEO plugins and Google Pagespeed Service:
Yoast SEO plugin
Google Pagespeed Service
Smush.it ( Optimizing Images )
SEO Friendly Images ( SEO Images )
To Add Widget on Sidebar, please following these steps:
1. Navigate to Appearance>Widgets to access the list of widgets and widget section that they can be added. The left hand side show all widgets you can use. The right hand side shows all different section you can add widgets to.
2. Simply drag and drop the widget you want into the widgets section you want to the right hand side.
3. When you finished, you can visit the site to see results.
Footer Widget Left

The team at Sanda-Media are always help you with any questions or recommendations you have about the Techcode theme.
If you need any help or support please contact us through the ThemeForest Messaging system or
direct at email: sandamediagr@gmail.com
You can find the version history (Change_Log.txt) file on Techcode_FullPackage.zip folder or you can check changelog on theme sale page.
Once again, thank you so much for purchasing this theme. As I said at the beginning, I'd be glad to help you if you have any questions relating to this theme. No guarantees, but I'll do my best to assist.
If you have a more general question relating to the themes on ThemeForest, you might consider visiting the forums and asking your question in the "Item Discussion" section.